Tempering Chocolate: A Step-by-Step Guide
Why Tempering Chocolate is Crucial for Great Results
If you’re a fan of chocolate bonbons, you know that they not only need to taste good, but they also need to look good. That’s where chocolate tempering comes in. Tempered chocolate will give your bonbons a beautiful, shiny appearance and the perfect snap. But if the chocolate isn’t tempered correctly, your bonbons may not release from the mold or they might end up with dull spots or marbling. That’s why it’s crucial to temper your chocolate before use.
The Seeding Method: A Simple and Reliable Technique
There are different methods for tempering chocolate, but the seeding method is one of the easiest and most reliable. This method involves adding small pieces of already-tempered chocolate (the seeding chocolate) to melted chocolate to encourage the formation of stable crystal structures. As a result, your chocolate will have a smooth texture and a beautiful sheen.
Step-by-Step Guide to Tempering Chocolate with the Seeding Method
Here’s how you can use the seeding method to temper your chocolate:
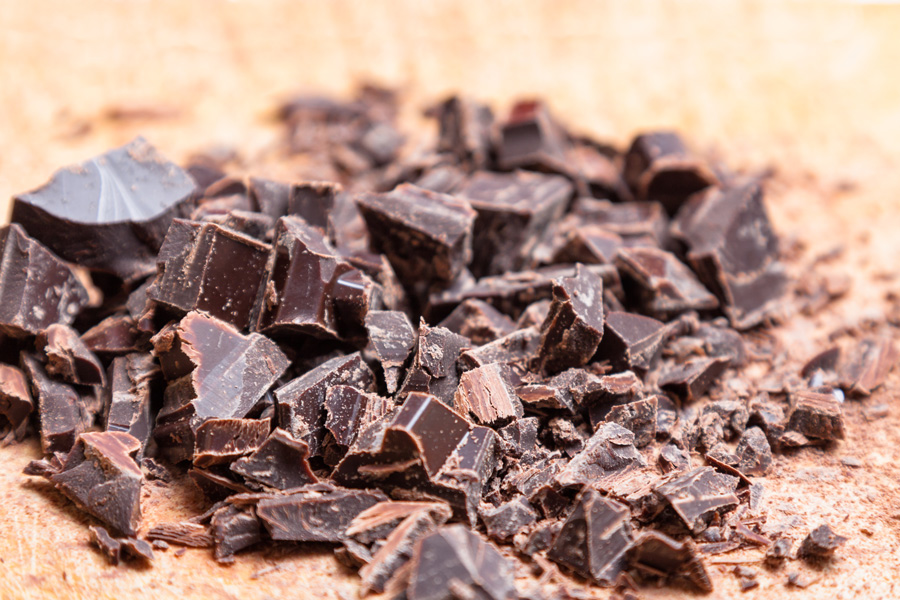
- Start by melting 400g of dark couverture chocolate (chopped into small pieces) in the microwave to 48-49°C. Heat the chocolate in intervals at approximately 600 watts, starting with 1 minute and gradually decreasing the time (finally for only 10 seconds). After each heating, use a silicone spatula to stir the chocolate and distribute the heat evenly.
- When the temperature of the chocolate reaches 48-49°C, add 100g of chopped seeding chocolate to the melted chocolate. Stir the chocolate briefly until all the added chocolate is covered with melted chocolate.
- Let the chocolate sit for 2 minutes, and then stir again. Stir calmly and only for around 10 seconds. Continue stirring briefly every 1-2 minutes, until the temperature of the chocolate reaches 34°C. It’s crucial that there’s still unmelted chocolate at 34°C. A few small pieces of seeding chocolate are enough. If there’s no unmelted chocolate at 34°C, add 5-10 pieces of chocolate, and stir them into the melted chocolate.
- After the temperature has passed 34°C, continue to stir the chocolate briefly every 1-2 minutes.
- If there is still unmelted chocolate at 33°C, heat the chocolate for 5 seconds in the microwave, and then stir briefly again. Repeat if necessary.
- When the temperature reaches 32°C, your chocolate is tempered and ready for use.
To learn how to temper other types of chocolate, visit Tine’s article on her blog. Her blog is filled with super useful information to master the art of chocolate making.
Tips for Successful Chocolate Tempering Every Time
While the seeding method is relatively simple, there are a few tips you can follow to ensure successful chocolate tempering every time:
- Use high-quality chocolate: the better the chocolate, the better the results.
- Keep everything dry: even a small amount of moisture can cause your chocolate to seize and become unusable.
- Work in a cool environment: high temperatures can affect the tempering process. Tine recommend 18-20°C for colouring moulds and 19-20°C for moulding shells.
- Use a reliable thermometer: accurate temperature measurement is essential for successful chocolate tempering.
- Don’t rush: take your time and follow the steps carefully to ensure perfectly tempered chocolate.
Enjoy Your Beautifully Tempered Chocolate and Delicious Bonbons!
Now that you know how to temper chocolate like a pro, you’re ready to make beautiful and delicious bonbons. Tempering chocolate can seem daunting at first, but with practice, you’ll soon master the technique and be able to create all kinds of chocolate treats with ease. Whether you’re a professional chocolatier or a home cook, properly tempered chocolate is key to achieving a smooth and glossy finish on your confections. With your newfound knowledge of the seeding method, you can experiment with different types of chocolate, add fillings and flavors, and create unique designs (with Roxy & Rich coloured cocoa butter) with confidence. Plus, you’ll be able to impress your friends and family with your homemade chocolates that not only look amazing but taste fantastic too. So why not give chocolate tempering a try and see how it can elevate your sweet creations to the next level?
—
Tine Forst – https://www.tinepreferschocolate.dk/
Be inspired by our ambassador and give her a follow on her social media platforms:
Instagram : https://www.instagram.com/tine.prefers.chocolate/
Facebook : https://www.facebook.com/profile.php?id=100076861577179
Also, check out her amazing e-books!